
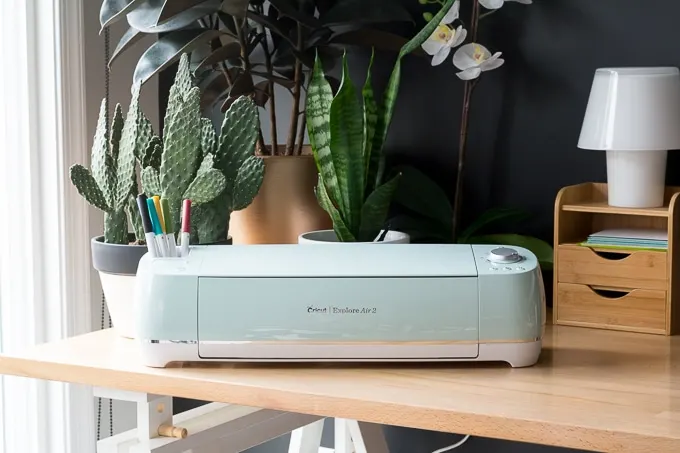
In this short review, we have covered everything a user should know about Cricut Explore Air 2. This series by Cricut helps you make the crafts of your choice. If you want an honest review for Explore Air 2, this blog may be a perfect example. The Explore Air 2 is a popular cutting machine crafters and DIY enthusiasts use for various projects such as card-making, scrapbooking, and vinyl cutting. It features advanced cutting technology that can cut over 100 materials, including cardstock, vinyl, iron-on, and more.
What Can You Expect Inside Explore Air 2 Box?
You get all the necessary accessories when you purchase a Brand new Explore Air 2. These are the overall standard equipment you will get inside the machine's box.
Your Brand new Cricut Explore Air 2
Power cord and adapter
USB cable
Premium fine-point blade
A welcome book
A LightGrip cutting mat (12" X 12")
Accessory adapter
Free trial membership to Cricut access (for new subscribers)
Materials to experiment
All these accessories are enough to help you with the installation of the machine and get started with your first project. However, the materials in the box may vary depending on the retailer or the bundle you buy. But all the mentioned accessories are a must to have to access your machine.
What Does Cricut Explore Air 2 Do?
Explore Air 2 can cut over 100 several materials, including cardstock, vinyl, iron-on, and more, with accuracy. With its dual carriage, it can cut and write or score simultaneously, allowing for efficient and seamless crafting and saving a lot of time.
The Explore Air 2 also has a wireless connection that enables users to design and cut projects directly from their computers, phones, or tablets using the Cricut Design Space software. With its versatile capabilities and user-friendly design, the Explore Air 2 is a must-have tool for any crafter or DIY enthusiast.
One of the machine's standout features is its wireless capabilities, which allow users to design and cut projects directly from their computers, phones, or tablets using the Cricut Design Space software. The software offers a vast library of images and fonts and the ability to upload custom designs, giving users endless creative possibilities.
The Explore Air 2 also features Smart Set Dial technology, automatically adjusting the blade depth and pressure based on the selected material, ensuring the perfect cut every time. Additionally, it has a fast mode that can cut up to two times faster than previous models, making it a time-saving tool for any crafter or DIY enthusiast.
Overall, the Explore Air 2 is a versatile cutting machine that empowers users to unleash their creativity and make professional-looking projects easily.
How to Set Up Cricut Explore Air 2 Machine?
When you know the working of Explore Air 2 machine, it's time to set it up to access all its features to get the desired results. We have given a step-by-step setup process to set up your Explore Air 2 machine on your desktop. You can also set it up on your mobile device by installing the Design Space app. See the steps and follow them accordingly.
Unboxing
The very first step is to unpack your Brand new Explore Air 2 machine and take off all the packaging materials and adhesive tapes.
Check Accessories
Don't miss to ensure that all required accessories are in the box. In case you find anything missing, you can contact your vendor or retailer about it.
Connect the Machine to Power
Connect your machine to the power adapter and the power outlet.
Insert Blades
You need to take the blades and insert them into the B carriage clamp by lifting them. Once you have inserted the blades into the clamp, lock it.
Connect the Machine to Device
Select a suitable method to connect your Cricut machine to either a computer or a mobile device via Bluetooth or a USB connection.
Setup Cricut ID
To proceed, you will need a Cricut ID. If you already have it, you can log in directly to Design Space; otherwise, you must create one via cricut.com/setup.
Download Design Space
Download Design Space from Cricut's website on your desktop or mobile device and log in with your Cricut ID.
Access the Machine
Once you log in, you are ready to access the Cricut machine and use the Design Space to make your designs and cut and draw them.
That's it! With these simple steps, you can set up your Explore Air 2 machine and create amazing projects.
How to Make a First Design on Explore Air 2?
It's very easy to create your first design with Explore Air 2. Let's see a sample to give you an idea of how to use the Cricut machine to create your first craft.
Setup Your Machine
If you used New Machine Setup on your computer earlier, you would see visit design.cricut.com. If it doesn't appear, click the Menu at the top and click New Machine Setup.
Then gather all the materials, including cutting mat, paper, cardstock, etc. Remove the plastic packaging from your cutting mat. Then, follow the given steps.
Create Your Design
The Design Space has many designs to choose from and use in your crafts. Many pre-made designs are also available.
Load the Material on the Mat
First of all, place your grey cardstock on the mat with the shiny side facing upwards. Adjust the cardstock in a vertical position with the mat.
Load Mat Into the Machine
After adjusting the material on the mat, load the mat into the machine. Press the mat gently against the rollers and press the Load/Unload button on the machine, which looks like a double arrow.
Select Your Cutting Options
After selecting the cutting options, press the Go button on your desktop or device. Then, the cutting will begin as per the settings.
Unload the Material From the Mat
After cutting, unload your material from the mat gently. You must use a weeding tool to remove the tiny particles to get a clean cut.
Enjoy Your Design
You can use transfer tape to design any surface, such as a mug, T-shirt, or your walls.
Finally, we know a brief about Cricut Explore Air 2 and its features. If you want a cutting machine that can give you precise cutting and make your crafts gracefully, this machine is good to go. The machine has also improved over the years, and customers love this. You can give it a try and start your everyday cutting projects.
Source BY : design.cricut.com/setup


