What Is The Smallest Cricut Machine For Making Crafts?

Cricut is among the major brands that manufacture best-in-class products. It offers modern DIY products that hobbyists and crafters use all around the world. Plus, the Cricut brand is famous for making machines of different shapes and sizes. The smallest Cricut machine can be a suitable choice for making eye-catching designs on uniquely small objects. 


Also, many crafters can use the smallest Cricut machine along with the standard machine to work on their projects. The smallest heat press of Cricut is EasyPress Mini, and Cricut Joy is the smallest cutting machine. If you are planning to get any of the smallest devices offered by Cricut, then this blog is going to help you with that. Therefore, keep reading this blog post to the end to acquire vital information about these devices. 


Read More here: Cricut.com/Setup

Cricut EasyPress Mini: Compact Heat Press Machine

Cricut EasyPress Mini is the most affordable and smallest device available in the Cricut brand. It is the best beginner-level device that can also be used with other Cricut heat press devices. This device can work perfectly on tiny products and slides smoothly, no matter how uneven the surface is. 


Additionally, its compact design and lightweight allow crafters to hold it firmly and use it easily. Also, due to its small size, it becomes easier to port this device from one place to another. EasyPress Mini works best for small projects such as shoes, shirt cuffs, stuffed animals, and others. 


Furthermore, it comes with the 3 heat settings that make it easier to use with the infusible ink and heat transfer projects. Plus, this device is compatible with using the HTV, iron-on, and infusible ink products of the major brands. EasyPress Mini has an auto-shutoff feature and an insulated safety base to enhance the safety features. In addition, it has also got a ceramic-coated heat plate that gives dry and even edge-to-edge heat on the whole surface. 


Read more here: cricut.com/register


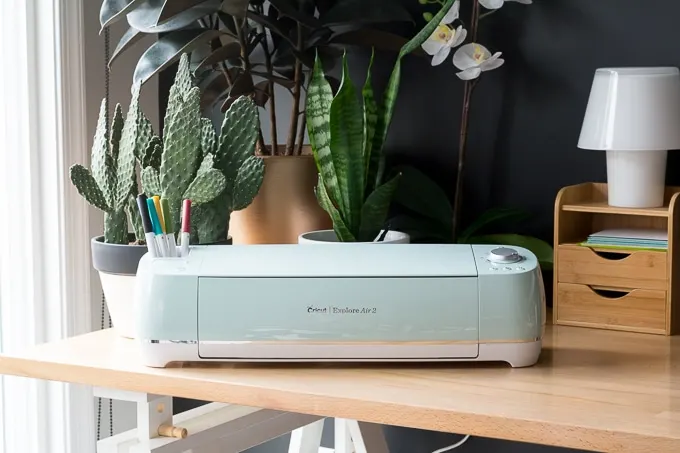
Cricut Joy: Smallest Cutting Machine For Beginners

Cricut Joy is a pretty basic, easy-to-use, and compact size cutting device. With the help of this machine, users can cut 50+ materials and get excellent performance. The setup process of this machine is very easy. Also, it comes with Bluetooth wireless connectivity that allows it to connect instantly to your computer and smartphone. 


In addition, its compact size and light weight make it an easy-to-store and highly portable device. Plus, with the help of Cricut Pen and Infusible Joy Infusible Ink, users can write and draw on their projects. It is compatible with smart materials to cut long projects. Users can also use the Cricut Design Space or Cricut Joy app to make compelling designs for their projects. 


Cricut Mug Press: Best Machine to Create Designs on Mug

Cricut Mug Press is not actually a very small machine, but it can be put in the category of small machines. It comes with one-touch settings that allow the creation of pro-level designs on a mug in just a few minutes. The Auto-shutoff feature provides top-notch security to its users. 

In addition, some other projects compatible with this device are infusible ink transfer sheets, markers, pens, and compatible mug blanks. Also, this device is able to provide peel-proof and dishwasher-safe projects with the help of infusible ink materials. Besides that, it does not require temperature and pressure settings which makes it easier for users to use this machine. 

Frequently Asked Questions (FAQs)

Is a Cricut Mini press better than iron?

The Cricut Mini Press is better than a regular iron in many aspects. You do not find the advanced temperature setting features. Also, the mini press comes with a ceramic heat plate that provides even heat on the whole surface. 

Which is the smallest Cricut?

The small Cricut machine available in the Cricut family is EasyPress Mini. Plus, it is also the most affordable device too. This device is a perfect tool to use with small and uniquely shaped objects. 

Do you need a mug press to make mugs with Cricut?

Yes, you need a mug press if you want to make amazing designs and text to customize your mug. Also, for some small designs, you can use the mini press to print designs on coffee mugs and tumblers. 


How To Use My Cricut Maker 3? [A Guide For Beginner]

Cricut has prepared its new model Cricut Maker 3, which comes under the most used Cricut machine. Crafters and artists prefer this machine for their regular projects. This re-engineered machine allows you to create more projects. The Cricut has made several improvements in this new machine. However, not every user may know about the use of Cricut maker 3. So, if you just bought a Maker 3 and you are thinking about how to use my Cricut Maker 3, this blog is for you. Here, you will get everything about it. 

What Is A Cricut Maker 3? 

The Cricut Maker 3 is a DIY cutting machine with the help of which you can cut various designs on different materials. This machine has been manufactured smarter and faster than ever. The Cricut Maker 3 can cut over 300 materials, including fabric, balsa wood, chipboard, leather, etc. Such machines were meant for industrial and commercial use. Still, companies like Cricut have made them accessible to crafters. 

Cricut Maker 3 Specifications 

There are some specifications of Cricut Maker 3: 

  1. High speed, power, and precision 

  2. Twice as fast as the original Maker while cutting Smart materials 

  3. It can cut up to 300 materials with 10 times more force 

  4. It can cut smart materials up to 75 feet 

  5. Includes an additional USB port used to charge tablets 

How To Use Cricut Maker 3? 

Cricut made their machines with an easy setup and use, although Cricut Maker 3 has a little complex use. Cricut Maker 3 is controlled with a computer, and it is designed for regular crafters and can cut felt, vinyl, paper, fabrics, and hard materials such as leather, wood, and matboard. When you know what a Cricut Maker 3 is, let's learn about its use. 

Read More : cricut.com/setup

Prepare Your Cricut Maker 

This is the first step, find a spacious place to setup your machine. As you know, cutting machines are usually loud, even if the designers make them as silent as possible. Hence, finding a room to install it is the very first task. Also, you should know that the Cricut Maker is the largest Cricut machine, which is why it needs a large space to fit. 


Ensure that the surface on which the machine is placed can tolerate the heavy materials that you put into the machine. So, once you have installed your Maker 3, unbox it and connect it to the power switch. 

Connect To The Internet And Update The Firmware 

Once you have unboxed your machine and plugged it into the main power board, the process doesn't end here. The Maker 3 is a complex machine and needs a firmware update before starting any project. The Maker 3 can easily connect to USB (wired) and Bluetooth (wireless). You can update firmware via the internet. 


Follow the steps to update the firmware in your Cricut Maker 3: 

  1. Move to the Cricut Design Space webpage. 

  2. Then, download and install the Cricut Design Space for your operating system. 

  3. Go with the on-screen instructions. 

  4. Either Sign in or create a new Cricut ID. 

  5. Now, setup the Maker 3 machine. 

  6. After that, the Design Space software will scan your Cricut Maker and detect the firmware update. The Design Space will also provide a list of available firmware versions. 

  7. Then, click Update. 

  8. Now, wait until the progress bar on the screen completes. 

  9. Then, the Cricut Maker 3 will restart when the Update is done. 

  10. Select Continue. 


So, now you have installed Maker 3, updated firmware, and gathered all accessories you may need. 

Use The Compatible Tools 

The tools of Maker 3 are made specifically for certain purposes. For instance, the blade meant for soft material will not cut the hard materials. Hence, you have to choose the right tool for the material you are working on. If you need to draw a design, you will use a pen, and when cutting, you will use a blade depending upon the nature of the material (soft or hard). 

Setup Your First Cut 

Once you have selected the material and tools, the first thing to do is place the Cricut cutting mat into the Cricut machine. To do this, remove the mat cover and place it in your Cricut Maker 3. 


Then, place the material on the cutting mat and make sure that it perfectly sticks to the surface. When you are done, load the mat and material into the Cricut machine. Then, reassure that you put the right tools in the machine. 

Weed Out Excess Material 

After cutting, the leftover material may adhere to the surface of your final cut. Hence, you need to weed it out using your hands. But thankfully, Cricut brings a tool called Cricut BrightPad that helps you find the leftover particles by providing a bright light. Hence, it becomes easy for users with weak eyesight or who want to prepare crafts faster. You just need to place your cut material on the BrightPad and start your weeding process. 

Finally, Prepare Your Project 

Once your material is cut and weeded out successfully, it's time to prepare for your first project. You can use a Cricut heat press and prepare customized T-shirts or something you like. Vinyl is very common, especially heat-transferable vinyl. You only need to cut the vinyl on Maker 3 into desired shape and size and then apply that design to fabrics and clothes using a heat press such as Cricut EasyPress 2. 


Therefore, using two machines will help you create the amazing projects you always wanted. You can use different materials on it, somewhere around 300. Now, convert your imagination into a craft. It was the short answer on how to use my Cricut Maker 3 that may assist you in going ahead and starting projects.


All You Need to Know About Cricut Explore Air 2

In this short review, we have covered everything a user should know about Cricut Explore Air 2. This series by Cricut helps you make the cra...