How to Customize Cricut Water Bottle?

If you are looking for creative and fun DIY projects for summer, you can try creating personalized water bottles with your Cricut machine. Summertime is coming, and staying hydrated is important during the scorching heat. During summertime, you can see many adults and kids carrying water bottles with them; they use them when thirsty to rehydrate themselves. 


You can also customize these normal and plain-looking water bottles with designs, images, or message you like. These customized water bottles make great gifts for kids and friends. It's a great way to remind them to keep themselves hydrated. Blank water bottles are easy to find and customize; whether it is a decal or sticker on a plastic bottle or stainless-steel water, there is something for everyone here.


What Items Do You Need to Make a Customized Water Bottle?

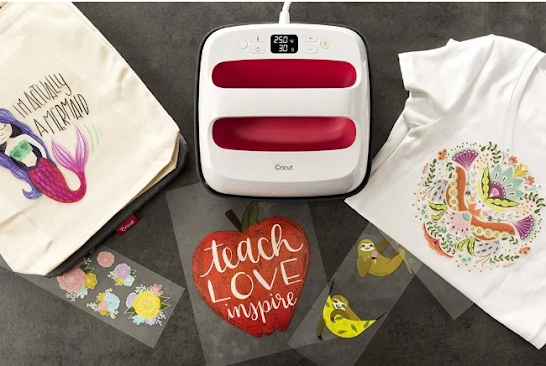
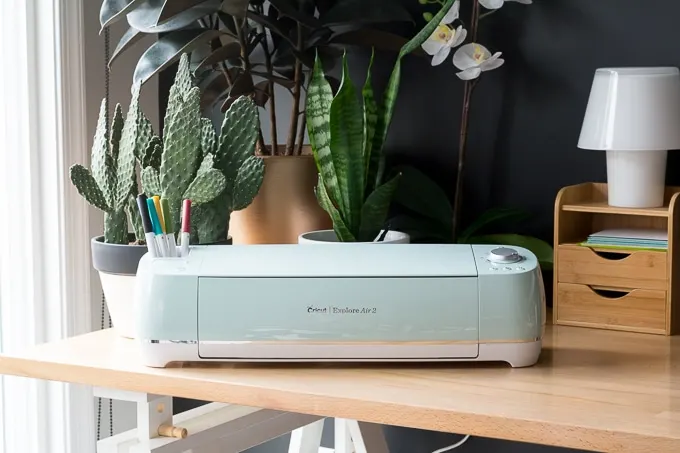
To make customized water, you first need a Cricut machine; use Cricut Explore or Maker model. Second, you'll need a blank water bottle; you can find these at craft stores and online. Third, you will need some adhesive vinyl in assorted colors. You can either use permanent or adhesive vinyl, depending on your choice. Use removable vinyl if you intend to use the design briefly. And lastly, a transfer tape to apply the vinyl to the bottle. You may also need a Cricut XL scraper.


What is the Best Cricut Vinyl for Water Bottles?

When you are looking for the best Cricut vinyl to customize your Cricut water bottles, you need to keep things in mind. You must first consider the type of water bottle you will use. If you use a stainless-steel water bottle for the project, you must find a vinyl specially made for that type of surface. The second thing you must remember is the water bottle's design. If the water bottle features a simple design, then any vinyl will do the trick. In contrast, if the water bottle boasts a more complex design, you must find vinyl specially designed for such multi-color designs. 


Last, you must remember the frequency of using the water bottle with the vinyl applied. If you only use it occasionally, then vinyl can do the job. But if you plan to use it frequently, you would want to use a durable vinyl that can handle repeated use and washing. Cricut permanent vinyl is perfect for water bottle projects, as it is designed to withstand all kinds of harsh conditions and can easily last up to three years or more. The same vinyl adds decals to several mailboxes and cars, giving you an idea of their durability.

Customizing Blank Water Bottles Using a Cricut Machine

Once all the necessary items are ready, you can proceed to the next step, customizing blank water bottles. We will use two blank stainless steel water bottles; one is straight-sided, and the other is a wave-shaped bottle with a slimmer neck, as an example, to keep things simple for you. The same process can be followed to customize other types of water bottles.


  • First, measure your water bottle to determine the size of your design.

  • Next, open the Design Space app to edit your design and size the images properly. For the straight-sided bottles, set the sign of the image at 4" wide. 

  • The wave-shaped bottle will require extra effort, as you'll need to add a bit of a curve to any text applied on a curved surface. It is done because when a straight line is applied to a curved surface, it doesn't produce straight results.

  • There are easy and hard ways to do it. The easy way is to play around with the curvature of the text in the app until you get it right. The hard way involves scanning a paper template of your water bottle in the Design Space app for a precise curvature measurement.

  • Then, use Cricut Explore or Maker to cut the adhesive vinyl. But before cutting the design, mirror your design so that it will be cut in reverse on the vinyl sheet.

  • Use the weeding tool to remove the excess vinyl from the design.

  • Cover the vinyl design with the transfer tape to apply the design to the water bottle. Furbish the vinyl with the XL scraper, and peel off the transfer tape.

  • Once your design is imprinted on the bottle's surface, carefully remove the transfer tape, and you're done.

Some Cool Cricut Water Bottle Projects

If you look forward to creating customized water bottles, some projects will inspire you to get started. For your next crafting session, you can try any of these projects.

  • Custom stainless-steel bottle: The stainless-steel water bottles made with vinyl look simple but gorgeous. For such projects, we recommend using bright color vinyl, but if you are using bright-colored water bottles, you can use white color vinyl to create the design as they don't overpower the design.

  • Simple and plain workout water bottle: This is a perfect and fun project for gym goers. They have to rehydrate themselves during the workout frequently and occasionally sip water. But no one says that you can't look cool doing it. Gym water bottles are simple and plain looking; you can use a motivational quote to customize them.

  • Customizing Kid's water bottle: If you have a kid or want to gift a kid something useful and personal, the custom kids' water bottles are great options. Customizing these bottles is very easy. For the design, you can write the kid's name on the waterproof label or a design that the kid loves. If he is a Disney fan, you can use Disney SVG files that are available out there that you can use to put on water bottles.

FAQs

How can you customize a blank water bottle?

When it comes to customizing water bottles with a Cricut machine, the possibilities are endless. 

  • You can add vinyl lettering or decals 

  • Make your stickers to add personality to your water bottle. Just peel and stick them onto the water bottle.

  • To completely change the look of the water bottle, wrap the whole thing in washi tape.

  • Paint it yourself with acrylics, enamels, or spray paint.

Is there a website to customize your water bottle?

If you want to customize your water bottle, you can check out the Cricut Water Bottle website. It allows you to customize the water bottle with different designs, colors, text, and images to make it look unique.

Where can you buy blank water bottles for the Cricut machine?

While looking for blank water bottles, you need to ensure that the bottles you will use are made from safe and foo-grade materials. Look for bottles that are compatible with the Cricut machine. Lastly, take the price and quantity of the bottles into consideration. You can purchase these bottles from the local craft store, or you can purchase them online.


Source By : design.cricut.com/setup

The Best Cricut Machines for Making Shirts [2023 Edition]

T-shirts are a wardrobe essential. You can wear them all year round, even in winter. Pair your T-shirt with jackets or sweaters during cold weather. Given how popular this piece of clothing is, you may want your T-shirt to stand out from the rest. You can do that by creating your customized T-shirt. If you like DIY projects and T-shirts, then why not combine both of these? 


With a Cricut machine, you can transform a plain T-shirt into a fashionable one. The Cricut machines range from $130 to $400. However, choosing the right one can be overwhelming. You need to invest in a good Cricut machine to get the job done right. Various Cricut models are available on the market that claims to be worth your money. This blog will discuss the best Cricut machines, their capabilities, price, and more so that you can make an informed decision regarding the best Cricut for making T-shirts.


Best Cricut Machine and Model for T-Shirt Making

All these Cricut Machines are up to the task of creating customized T-shirts, but they all have some pros and cons. By the end of this blog, you will have a clear idea about which to choose. So, let's begin.

Cricut Easy Press 2

Heat Transfer Vinyl (HTV) can be done in various ways. It's the best heat press for home use that can be used for almost any type of heat-transfer project. The Cricut Easy Press 2 falls between a professional press and a traditional home iron. You may also have seen a video tutorial or blog stating that HTV can be achieved using a conventional iron. Although it's achievable, it can do more harm than good. These irons were meant to generate steam and remove wrinkles; they were not designed to create shirts.


While using Cricut Easy Press 2, you don't have to worry about hurting your hands. It's very lightweight, ergonomic, and safe to use. It comes with its app, where you can control the machine's temperature and time. The Cricut machine is compatible with most iron-on materials and infusible ink. Compared to traditional iron, the heat is evenly distributed throughout the plate. Lastly, it comes at an affordable price tag.

Cricut Explore Air 2

This consumer-grade cutting machine is from the previous generation, but it's one of the best computer-operated cutting machines. Unlike Cricut Easy Press 2, it can't be used as a heat press. It's ideal for creating embroideries and stitch-on patterns. Easy Press 2 allows you to create custom T-shirts right from the ground.


It can cut over 100 materials with the cutting size, which is more than enough for any T-shirt design. The Fast Mode feature lets you perform the cutting twice at twice the speed without compromising on quality. It's compatible with six different tools, which you can choose according to your needs. With Bluetooth wireless technology, you can easily connect to any device. The Cricut machine also comes with its design app, which makes it relatively easy to use. The price tag is much lower than other Cricut machines as it is an older model.

Cricut Maker 3

Cricut Maker 3 is one of the most powerful Cricut Cutting Machines. It is compatible with over 300 materials ranging from soft fabric to more rigid materials. And has a maximum cutting length of 12 feet. 

Cricut Maker 3 is also compatible with 13 tools and comes with its app. 

Cricut Explore 3

It falls somewhere in between Cricut Explore Air 2 and Cricut Maker. It's a bit bigger, but it does have some tricks up its sleeve. It has a maximum material cutting length of 12 feet. The additional feature that Explore 3 has to offer is that it can handle smart materials, which means it doesn't need a cutting mat. It is two times faster than Explore Air 2. Although the Cricut Explore 3 has a heftier price tag, the extra tools and features are worth the money.

Cricut Maker

If you don't want to put too much burden on your pocket and are dead set on buying a Cricut machine, then you could go for Cricut Maker. It's an older version of the Cricut Maker series. It does share some traits with Cricut Maker 3, such as cross-compatible cutting and folding tools and compatibility with up to 300 materials. 

Conclusion

If you're looking for a Cricut machine for simple DIY projects, primarily for home use, then you should go for Cricut Easy Press 2, Cricut Explore Air 2. At the same time, other Cricut machines are bulkier and meant for commercial use. Hope this blog proves to be helpful.


What Is The Smallest Cricut Machine For Making Crafts?

Cricut is among the major brands that manufacture best-in-class products. It offers modern DIY products that hobbyists and crafters use all around the world. Plus, the Cricut brand is famous for making machines of different shapes and sizes. The smallest Cricut machine can be a suitable choice for making eye-catching designs on uniquely small objects. 


Also, many crafters can use the smallest Cricut machine along with the standard machine to work on their projects. The smallest heat press of Cricut is EasyPress Mini, and Cricut Joy is the smallest cutting machine. If you are planning to get any of the smallest devices offered by Cricut, then this blog is going to help you with that. Therefore, keep reading this blog post to the end to acquire vital information about these devices. 


Read More here: Cricut.com/Setup

Cricut EasyPress Mini: Compact Heat Press Machine

Cricut EasyPress Mini is the most affordable and smallest device available in the Cricut brand. It is the best beginner-level device that can also be used with other Cricut heat press devices. This device can work perfectly on tiny products and slides smoothly, no matter how uneven the surface is. 


Additionally, its compact design and lightweight allow crafters to hold it firmly and use it easily. Also, due to its small size, it becomes easier to port this device from one place to another. EasyPress Mini works best for small projects such as shoes, shirt cuffs, stuffed animals, and others. 


Furthermore, it comes with the 3 heat settings that make it easier to use with the infusible ink and heat transfer projects. Plus, this device is compatible with using the HTV, iron-on, and infusible ink products of the major brands. EasyPress Mini has an auto-shutoff feature and an insulated safety base to enhance the safety features. In addition, it has also got a ceramic-coated heat plate that gives dry and even edge-to-edge heat on the whole surface. 


Read more here: cricut.com/register


Cricut Joy: Smallest Cutting Machine For Beginners

Cricut Joy is a pretty basic, easy-to-use, and compact size cutting device. With the help of this machine, users can cut 50+ materials and get excellent performance. The setup process of this machine is very easy. Also, it comes with Bluetooth wireless connectivity that allows it to connect instantly to your computer and smartphone. 


In addition, its compact size and light weight make it an easy-to-store and highly portable device. Plus, with the help of Cricut Pen and Infusible Joy Infusible Ink, users can write and draw on their projects. It is compatible with smart materials to cut long projects. Users can also use the Cricut Design Space or Cricut Joy app to make compelling designs for their projects. 


Cricut Mug Press: Best Machine to Create Designs on Mug

Cricut Mug Press is not actually a very small machine, but it can be put in the category of small machines. It comes with one-touch settings that allow the creation of pro-level designs on a mug in just a few minutes. The Auto-shutoff feature provides top-notch security to its users. 

In addition, some other projects compatible with this device are infusible ink transfer sheets, markers, pens, and compatible mug blanks. Also, this device is able to provide peel-proof and dishwasher-safe projects with the help of infusible ink materials. Besides that, it does not require temperature and pressure settings which makes it easier for users to use this machine. 

Frequently Asked Questions (FAQs)

Is a Cricut Mini press better than iron?

The Cricut Mini Press is better than a regular iron in many aspects. You do not find the advanced temperature setting features. Also, the mini press comes with a ceramic heat plate that provides even heat on the whole surface. 

Which is the smallest Cricut?

The small Cricut machine available in the Cricut family is EasyPress Mini. Plus, it is also the most affordable device too. This device is a perfect tool to use with small and uniquely shaped objects. 

Do you need a mug press to make mugs with Cricut?

Yes, you need a mug press if you want to make amazing designs and text to customize your mug. Also, for some small designs, you can use the mini press to print designs on coffee mugs and tumblers. 


How To Use My Cricut Maker 3? [A Guide For Beginner]

Cricut has prepared its new model Cricut Maker 3, which comes under the most used Cricut machine. Crafters and artists prefer this machine for their regular projects. This re-engineered machine allows you to create more projects. The Cricut has made several improvements in this new machine. However, not every user may know about the use of Cricut maker 3. So, if you just bought a Maker 3 and you are thinking about how to use my Cricut Maker 3, this blog is for you. Here, you will get everything about it. 

What Is A Cricut Maker 3? 

The Cricut Maker 3 is a DIY cutting machine with the help of which you can cut various designs on different materials. This machine has been manufactured smarter and faster than ever. The Cricut Maker 3 can cut over 300 materials, including fabric, balsa wood, chipboard, leather, etc. Such machines were meant for industrial and commercial use. Still, companies like Cricut have made them accessible to crafters. 

Cricut Maker 3 Specifications 

There are some specifications of Cricut Maker 3: 

  1. High speed, power, and precision 

  2. Twice as fast as the original Maker while cutting Smart materials 

  3. It can cut up to 300 materials with 10 times more force 

  4. It can cut smart materials up to 75 feet 

  5. Includes an additional USB port used to charge tablets 

How To Use Cricut Maker 3? 

Cricut made their machines with an easy setup and use, although Cricut Maker 3 has a little complex use. Cricut Maker 3 is controlled with a computer, and it is designed for regular crafters and can cut felt, vinyl, paper, fabrics, and hard materials such as leather, wood, and matboard. When you know what a Cricut Maker 3 is, let's learn about its use. 

Read More : cricut.com/setup

Prepare Your Cricut Maker 

This is the first step, find a spacious place to setup your machine. As you know, cutting machines are usually loud, even if the designers make them as silent as possible. Hence, finding a room to install it is the very first task. Also, you should know that the Cricut Maker is the largest Cricut machine, which is why it needs a large space to fit. 


Ensure that the surface on which the machine is placed can tolerate the heavy materials that you put into the machine. So, once you have installed your Maker 3, unbox it and connect it to the power switch. 

Connect To The Internet And Update The Firmware 

Once you have unboxed your machine and plugged it into the main power board, the process doesn't end here. The Maker 3 is a complex machine and needs a firmware update before starting any project. The Maker 3 can easily connect to USB (wired) and Bluetooth (wireless). You can update firmware via the internet. 


Follow the steps to update the firmware in your Cricut Maker 3: 

  1. Move to the Cricut Design Space webpage. 

  2. Then, download and install the Cricut Design Space for your operating system. 

  3. Go with the on-screen instructions. 

  4. Either Sign in or create a new Cricut ID. 

  5. Now, setup the Maker 3 machine. 

  6. After that, the Design Space software will scan your Cricut Maker and detect the firmware update. The Design Space will also provide a list of available firmware versions. 

  7. Then, click Update. 

  8. Now, wait until the progress bar on the screen completes. 

  9. Then, the Cricut Maker 3 will restart when the Update is done. 

  10. Select Continue. 


So, now you have installed Maker 3, updated firmware, and gathered all accessories you may need. 

Use The Compatible Tools 

The tools of Maker 3 are made specifically for certain purposes. For instance, the blade meant for soft material will not cut the hard materials. Hence, you have to choose the right tool for the material you are working on. If you need to draw a design, you will use a pen, and when cutting, you will use a blade depending upon the nature of the material (soft or hard). 

Setup Your First Cut 

Once you have selected the material and tools, the first thing to do is place the Cricut cutting mat into the Cricut machine. To do this, remove the mat cover and place it in your Cricut Maker 3. 


Then, place the material on the cutting mat and make sure that it perfectly sticks to the surface. When you are done, load the mat and material into the Cricut machine. Then, reassure that you put the right tools in the machine. 

Weed Out Excess Material 

After cutting, the leftover material may adhere to the surface of your final cut. Hence, you need to weed it out using your hands. But thankfully, Cricut brings a tool called Cricut BrightPad that helps you find the leftover particles by providing a bright light. Hence, it becomes easy for users with weak eyesight or who want to prepare crafts faster. You just need to place your cut material on the BrightPad and start your weeding process. 

Finally, Prepare Your Project 

Once your material is cut and weeded out successfully, it's time to prepare for your first project. You can use a Cricut heat press and prepare customized T-shirts or something you like. Vinyl is very common, especially heat-transferable vinyl. You only need to cut the vinyl on Maker 3 into desired shape and size and then apply that design to fabrics and clothes using a heat press such as Cricut EasyPress 2. 


Therefore, using two machines will help you create the amazing projects you always wanted. You can use different materials on it, somewhere around 300. Now, convert your imagination into a craft. It was the short answer on how to use my Cricut Maker 3 that may assist you in going ahead and starting projects.


Cricut Explore Air 3: Is There Any Device With This Name?

Many people get confused and search for the Cricut Explore Air 3 though Cricut does not manufacture any machine with this name. However, Cricut makes two different devices, the name Cricut Explore 3 and Cricut Explore Air 2. The Explore Air 2 is the predecessor of the Explore 3. The company decides to drop the word from its latest Explore series. Thus, it creates some confusion among people. 

So, if you are looking forward to upgrading from Explore Air 2 to Cricut Explore Air 3, then you should buy Cricut Explore 3. In the specific write, you are going to attain in-depth and essential information about this machine. 

Cricut Explore 3 overview

Cricut Explore 3 is a multifunction crafting machine that is best for making world-class DIY at home. It is a very handy device and can easily write, draw, foil, and score. Additionally, it offers a very fast speed and pin-point precision that you cannot find in its predecessor or others cutting machines. 

Additionally, it works perfectly with smart materials as well as other kinds of materials that allow you to make jaw-dropping designs, from clothes too big banners. It comes with USB and Bluetooth compatibility that lets you easily connect with your computer and mobile. 

Its special pin-point blade gives the utmost result when cutting the projects and helps you create top brand-like customized crafts and artwork without much hassle. 

What comes in the box of Cricut Explore 3?

The products you are going to get in the box of Explore 3 are as follows-

  1. A Welcome card
  2. Test materials to practice cutting. 
  3. Free trial subscription to Cricut Access for new users. 
  4. A premium quality Fine-Point Blade with Housing. 
  5. A USB cable and a power adaptor. 
  6. Around 100 ready to make online projects. 

What are the features of Cricut Explore 3?

The key features of the Cricut Explore 3 are as follows.

  1. The machine works with six other tools, which are sold separately. With the help of that tool, you can cut, score, foil, write, and many more. 
  2. This machine is two times faster than its predecessor. 
  3. It is compatible with Bluetooth wireless technology. 
  4. This machine has built-in storage and a docking slot for mobile devices. 
  5. It can be used with the Cricut Design Space free app.
  6. Cricut Roll Holder is attachable to this machine to support large smart materials. 

What is the setup process of the Cricut Explore 3?

Follow the follow-up steps to complete the setup process of Explore 3.

  • Firstly, connect your device to the power outlet and switch the button to turn it on. 
  • Next, establish a connection between your Cricut machine and computer device using a USB cable. 
  • Now, pair the machine to the computer device utilizing the Bluetooth connectivity feature. 
  • After that, open any web browser on your device and visit the design.cricut.com/setup website. 
  • From the website, you need to download the Cricut Design Space and install it on your computer system. 
  • You need to follow the on-screen instructions to sign in with the old account or create a new one. 
  • When the setup process is done properly, you will be asked to cut your first design on the explore 3 devices. 

Frequently Asked Questions (FAQs)

Is there a machine name Cricut Explore Air 3?

No, there is no machine produced by the Cricut Explore Air 3 by the Cricut company. However, you can get Cricut Explore 3, which is the successor of the Cricut Explore Air 2. 

Can Cricut Explore 3 engrave?

Cricut Explore 3 is full of a wide range of features and compatible with various tools. So, with the help of those tools, it can perform various tasks like cutting, scoring, foiling, and writing. Additionally, it has powerful blades that can cut a large number of soft materials and some thin hard materials like wood, metal, and plastic. 

What do I need to buy with my Cricut Explore 3?

Below are the must-have products if you are going to buy Explore 3.

  1. You are going to get Fine-Point Blade in the purchase box. But you have to keep some spare blades if you are planning to use the machine on a daily basis. 
  2. A mat is also essential if you want to make your designs of top quality. 
  3. Cricut pens are also very essential if you have an Explore 3 machine.
  4. Additionally, scoring stylus. 

Can Cricut Explore 3 cut metal?

Yes, the Cricut Explore 3 is able to cut a large number of materials, including metals. So, don’t worry and stop yourself from making the projects you want.

Soucre URL : Cricut.com/setup & www.cricut.com/setup

Types Of Cricut Vinyl Explained: Beginner’s Guide

For Cricut craft enthusiasts, knowing about vinyl is of great importance. After all, it lets them create easily removable labels, personalized kitchen containers, home decor, gifts, and more. Taking these factors into account, we have developed this blog post explaining different types of vinyl for Cricut. As a reader, you will get to know its different types and the purpose they are used for. Go and Check out the different types of Cricut vinyl for your craft projects. We have tried to break them all for a better understanding. 

Vinyl comes in a comprehensive collection of colors and varieties of patterns with finishes matte and glossy. Primarily, there are two types of vinyl. The first is regular adhesive-backed vinyl and HTV or heat transfer vinyl, and the second is iron-on vinyl that can be used for fabrics like t-shirts, tote bags, and more. Therefore, when you go to purchase, don’t forget to check the label as it will tell exactly the kind of vinyl it is. Let’s get started with understanding different types of vinyl in detail. 

Regular Vinyl 

Regular vinyl is a standard vinyl that you can use for many other kinds. Genuinely, it is known as vinyl. 

This vinyl is not permanent and not removable. You can use it for many projects to bring out flawless results with your DIY cutting projects. Regular vinyl doesn’t like to lie flat, so burnishing is vital. After applying transfer tape, crafters can burnish before weeding from the front and back once they successfully use the vinyl to the surface. 

Cricut Iron On Vinyl (HTV)

So many iron-on vinyl types are available, like Cricut easy press, heat press, and more. Like regular Cricut vinyl, there are a variety of colors and pattern options available in this type of vinyl too. If you want to create sports-themed projects, mesh vinyl is something you can choose. 

Glitter Vinyl 

Glitter vinyl type is great for adding fun to a craft project. Crafters can prefer this for their projects as it is temporary and not removable. Its quality is also fake-proof and highly gorgeous. The only point to remember is that you need to use strong grip transfer tape with this vinyl tape. This vinyl type gives you flawless results. 

Premium Permanent Vinyl 

Just like the name of this vinyl, it is considered of permanent type. This vinyl tends to hold up much longer than traditional vinyl. Premium permanent vinyl is so sticky that if you try to remove it, you will see a residue left behind. Crafters can use this for projects with plans not to switch out and want the results to last for a long time. 

Everyday Iron On 

This is the most used vinyl because of the feature of all-around heat transfer, which works for most projects. Though it is commonly used, you can’t use it with stretchy materials. This vinyl type works perfectly fine for cotton and cotton-poly blends. For crafters, iron-on vinyl proves excellent for t-shirts and other non-stretchy materials. Also, you can use it all the time to cut iron on wood.

Specialty Iron On Vinyl 

Similar to regular vinyl, iron-on vinyl is available in holographic and glitter. This vinyl is thick in texture and can be used to get the deep cuts that you, as a crafter, need. Make sure to select iron and glitter iron in your settings. 

Fun Specialty Vinyl Options 

This vinyl type works excellently in making almost all kinds of projects. As a crafter, you can use them for fun projects, from decorating windows to glass doors for holidays and other special occasions. 
Above all, we have discussed different types of Cricut vinyl. You can use them depending on the project you are doing. Other types of vinyl are available for every different project. So, before getting them straight, keep the project type in your mind before getting started. Below we will mention some of the most commonly asked questions we use to hear from Cricut users.

Frequently Asked Questions

Which Vinyl is Better, Thicker or Thinner? 

If you want added stability and support, we recommend you choose thicker vinyl. Thicker vinyl works wonders for tiles like ceramic and porcelain, ensuring the surface is perfectly leveled. 

Can I Find Permanent Vinyl Waterproof? 

Permanent vinyl types are actually waterproof and are assumed to last more than three years. 

Do I Need To Seal Cricut Vinyl?

As a matter of fact, if you use good-quality vinyl, you do not need to seal vinyl crafts. The vinyl itself will get adhered to your projects, and it will make your projects look good for a long time.

Source URL : Cricut.com/setup , cricut.com

Cricut Easy Press: Lightweight, Portable, and Easy to Store || Cricut.com/setup

In this blog, we have explained each and every detail about the Cricut Easy Press machine. We have compared it with the Easy Press 2 and included everything about it as available on the Internet. By the end, it will clear each and every doubt regarding the Easy Press machine.

Things To Know Before You Buy The Cricut Easy Press 

Before buying an Easy Press Machine, remember what material you will be using your machine on. If you want to use it on baby clothes like onesies, we recommend getting the biggest size, 10x16 inches.

The smaller Easy Press machine will suit smaller designs, and for the bigger designs like adult T-shirts, the bigger the machine, the better it is. 

You can use Easy Press to apply vinyl to glass or wood. All you need is the right temperature and timer settings for the project. 

You have to buy the Cricut mats separately when using Cricut Easy Press. Before purchasing the mat, make sure that you have an equivalent mat for your Easy Press Machine

How To Use The Cricut Easy Press

Follow the following steps for using the Cricut Easy Press:

  • Press the power button and set your desired temperature. It is recommended to refer to the ideal temperature settings guide before you choose the temperature for your project. 
  • The Cricut logo will be orange until your set temperature is reached, and when the Cricut logo color is turned green, it will indicate by a sound that the set temperature has been reached. 
  • After your temperature has been reached, i.e., the Cricut logo is green. Place your Easy Press over the material you’re working on and apply medium pressure.         
  • Make sure you turn on the countdown so that you get a signal from your Easy Press Machine when to lift the iron. 
  • You can increase or decrease your temperature by clicking the plus and minus buttons. You can even change the temperature settings from Fahrenheit to Celsius by pressing on the thermometer.          
  • The Easy Press machine comes equipped with a protective plastic case for storing your machine.  It is for the safety of the user so that you might not get burned when using the machine. 

Materials You Can Use Your Cricut Easy Press On

The primary material to use the Cricut Easy Press is on the fabrics. Easy Press is by far the best machine to apply vinyl on fabrics. Easy Press is a great tool when it comes to use on flat surfaces.

For example, the Easy Press machine can add decals on the plate and use iron in the mugs.   

Fabrics are by far the best machine because of their quick heating (max 60 seconds) and heating temperature of up to 405 F. Also, the heating speed depends on your Easy Press machine.  

What size Easy Press should you buy?

It is tough to decide, but in our recommendation, the biggest one will help you with bigger projects in case you want to use it for bigger surfaces.    

Difference between Cricut Easy Press And Cricut Easy Press 2 

There are some minor differences between the two and some major differences. The first major difference is that the Easy Press used to come only in one size, while the new generation Easy Press 2 comes in four sizes ranging from small to large. 

The second difference between the two is that the latest Easy Press 2 can memorize the last setting for the machine used. This feature was not available in the older Easy Press. Though both the Easy Press machines have 10-minute safety off.     

Discussing the structural differences between the Easy Press and Easy Press are as follows:

  • The Easy Press machine used to be fast, but the new generation continues to be even faster than its successor model.
  • The Easy Press 2 comes with a protective plastic case which the old version didn't have. The plastic case is for the safety of the user to avoid burns when hands get in direct contact with the machine. 
  • Also, just like the heating speed has been improved in the Easy Press 2, the cooling speed has also increased tremendously up to 60%.    

What are Cricut Easy Press Limitations?

The biggest issue with the Cricut Easy Press was that it would only work on flat surfaces. It was hard to work on uneven objects like the baseball cap. 

Though there are solutions to using the Cricut EasyPress on uneven surfaces, it will be really time-consuming for you, and doing it for bulk orders will be extremely difficult.

Another place the Cricut Easy Press used to fall short was in the mug department. Since the mug is not on a flat surface, the Easy Press will take time to perform its job. For the mug department, the industrial machine performs better. Or you can use the smallest Cricut Easy Press, but you have to apply it multiple times to make the vinyl stick to the mug. But, for customizing plates, the Easy Press machine is better. 

Please refer to our Frequently Asked Questions if you have any doubts regarding the Cricut Easy Press. If you want to read more blogs like this, please stay connected with us.     

Frequently Asked Questions

What Is The Use Of Cricut Easy Press?

The Cricut Easy Press is specially designed for crafters who are working on heat projects like making T-Shirts. These machines were designed to complete the heating tasks as fast as possible.   

Which Is The Best Cricut Easy Press To Buy in 2022?

We recommend you buy the Cricut Easy Press 2 as this machine comes in three different sizes. You can choose the size from small, medium, and large according to your usage and the materials you want to heat. If you want to heat press adult T-shirts, you should go for the bigger Easy Press machines. 

Is The Cricut Easy Press Worth It To Buy In 2022?

Yes, the Cricut Easy Press is definitely worth the money and is better than the household iron. It is also cheap in price, does all sorts of heat transfer jobs, and offers different settings. For heating.

Some more information: Cricut.com/setup, Cricut.com/setup

All You Need to Know About Cricut Explore Air 2

In this short review, we have covered everything a user should know about Cricut Explore Air 2. This series by Cricut helps you make the cra...