Types Of Cricut Vinyl Explained: Beginner’s Guide

For Cricut craft enthusiasts, knowing about vinyl is of great importance. After all, it lets them create easily removable labels, personalized kitchen containers, home decor, gifts, and more. Taking these factors into account, we have developed this blog post explaining different types of vinyl for Cricut. As a reader, you will get to know its different types and the purpose they are used for. Go and Check out the different types of Cricut vinyl for your craft projects. We have tried to break them all for a better understanding. 

Vinyl comes in a comprehensive collection of colors and varieties of patterns with finishes matte and glossy. Primarily, there are two types of vinyl. The first is regular adhesive-backed vinyl and HTV or heat transfer vinyl, and the second is iron-on vinyl that can be used for fabrics like t-shirts, tote bags, and more. Therefore, when you go to purchase, don’t forget to check the label as it will tell exactly the kind of vinyl it is. Let’s get started with understanding different types of vinyl in detail. 

Regular Vinyl 

Regular vinyl is a standard vinyl that you can use for many other kinds. Genuinely, it is known as vinyl. 

This vinyl is not permanent and not removable. You can use it for many projects to bring out flawless results with your DIY cutting projects. Regular vinyl doesn’t like to lie flat, so burnishing is vital. After applying transfer tape, crafters can burnish before weeding from the front and back once they successfully use the vinyl to the surface. 

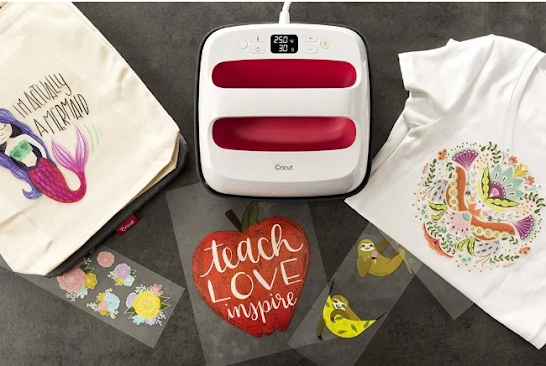
Cricut Iron On Vinyl (HTV)

So many iron-on vinyl types are available, like Cricut easy press, heat press, and more. Like regular Cricut vinyl, there are a variety of colors and pattern options available in this type of vinyl too. If you want to create sports-themed projects, mesh vinyl is something you can choose. 

Glitter Vinyl 

Glitter vinyl type is great for adding fun to a craft project. Crafters can prefer this for their projects as it is temporary and not removable. Its quality is also fake-proof and highly gorgeous. The only point to remember is that you need to use strong grip transfer tape with this vinyl tape. This vinyl type gives you flawless results. 

Premium Permanent Vinyl 

Just like the name of this vinyl, it is considered of permanent type. This vinyl tends to hold up much longer than traditional vinyl. Premium permanent vinyl is so sticky that if you try to remove it, you will see a residue left behind. Crafters can use this for projects with plans not to switch out and want the results to last for a long time. 

Everyday Iron On 

This is the most used vinyl because of the feature of all-around heat transfer, which works for most projects. Though it is commonly used, you can’t use it with stretchy materials. This vinyl type works perfectly fine for cotton and cotton-poly blends. For crafters, iron-on vinyl proves excellent for t-shirts and other non-stretchy materials. Also, you can use it all the time to cut iron on wood.

Specialty Iron On Vinyl 

Similar to regular vinyl, iron-on vinyl is available in holographic and glitter. This vinyl is thick in texture and can be used to get the deep cuts that you, as a crafter, need. Make sure to select iron and glitter iron in your settings. 

Fun Specialty Vinyl Options 

This vinyl type works excellently in making almost all kinds of projects. As a crafter, you can use them for fun projects, from decorating windows to glass doors for holidays and other special occasions. 
Above all, we have discussed different types of Cricut vinyl. You can use them depending on the project you are doing. Other types of vinyl are available for every different project. So, before getting them straight, keep the project type in your mind before getting started. Below we will mention some of the most commonly asked questions we use to hear from Cricut users.

Frequently Asked Questions

Which Vinyl is Better, Thicker or Thinner? 

If you want added stability and support, we recommend you choose thicker vinyl. Thicker vinyl works wonders for tiles like ceramic and porcelain, ensuring the surface is perfectly leveled. 

Can I Find Permanent Vinyl Waterproof? 

Permanent vinyl types are actually waterproof and are assumed to last more than three years. 

Do I Need To Seal Cricut Vinyl?

As a matter of fact, if you use good-quality vinyl, you do not need to seal vinyl crafts. The vinyl itself will get adhered to your projects, and it will make your projects look good for a long time.

Source URL : Cricut.com/setup , cricut.com

Cricut Easy Press: Lightweight, Portable, and Easy to Store || Cricut.com/setup

In this blog, we have explained each and every detail about the Cricut Easy Press machine. We have compared it with the Easy Press 2 and included everything about it as available on the Internet. By the end, it will clear each and every doubt regarding the Easy Press machine.

Things To Know Before You Buy The Cricut Easy Press 

Before buying an Easy Press Machine, remember what material you will be using your machine on. If you want to use it on baby clothes like onesies, we recommend getting the biggest size, 10x16 inches.

The smaller Easy Press machine will suit smaller designs, and for the bigger designs like adult T-shirts, the bigger the machine, the better it is. 

You can use Easy Press to apply vinyl to glass or wood. All you need is the right temperature and timer settings for the project. 

You have to buy the Cricut mats separately when using Cricut Easy Press. Before purchasing the mat, make sure that you have an equivalent mat for your Easy Press Machine

How To Use The Cricut Easy Press

Follow the following steps for using the Cricut Easy Press:

  • Press the power button and set your desired temperature. It is recommended to refer to the ideal temperature settings guide before you choose the temperature for your project. 
  • The Cricut logo will be orange until your set temperature is reached, and when the Cricut logo color is turned green, it will indicate by a sound that the set temperature has been reached. 
  • After your temperature has been reached, i.e., the Cricut logo is green. Place your Easy Press over the material you’re working on and apply medium pressure.         
  • Make sure you turn on the countdown so that you get a signal from your Easy Press Machine when to lift the iron. 
  • You can increase or decrease your temperature by clicking the plus and minus buttons. You can even change the temperature settings from Fahrenheit to Celsius by pressing on the thermometer.          
  • The Easy Press machine comes equipped with a protective plastic case for storing your machine.  It is for the safety of the user so that you might not get burned when using the machine. 

Materials You Can Use Your Cricut Easy Press On

The primary material to use the Cricut Easy Press is on the fabrics. Easy Press is by far the best machine to apply vinyl on fabrics. Easy Press is a great tool when it comes to use on flat surfaces.

For example, the Easy Press machine can add decals on the plate and use iron in the mugs.   

Fabrics are by far the best machine because of their quick heating (max 60 seconds) and heating temperature of up to 405 F. Also, the heating speed depends on your Easy Press machine.  

What size Easy Press should you buy?

It is tough to decide, but in our recommendation, the biggest one will help you with bigger projects in case you want to use it for bigger surfaces.    

Difference between Cricut Easy Press And Cricut Easy Press 2 

There are some minor differences between the two and some major differences. The first major difference is that the Easy Press used to come only in one size, while the new generation Easy Press 2 comes in four sizes ranging from small to large. 

The second difference between the two is that the latest Easy Press 2 can memorize the last setting for the machine used. This feature was not available in the older Easy Press. Though both the Easy Press machines have 10-minute safety off.     

Discussing the structural differences between the Easy Press and Easy Press are as follows:

  • The Easy Press machine used to be fast, but the new generation continues to be even faster than its successor model.
  • The Easy Press 2 comes with a protective plastic case which the old version didn't have. The plastic case is for the safety of the user to avoid burns when hands get in direct contact with the machine. 
  • Also, just like the heating speed has been improved in the Easy Press 2, the cooling speed has also increased tremendously up to 60%.    

What are Cricut Easy Press Limitations?

The biggest issue with the Cricut Easy Press was that it would only work on flat surfaces. It was hard to work on uneven objects like the baseball cap. 

Though there are solutions to using the Cricut EasyPress on uneven surfaces, it will be really time-consuming for you, and doing it for bulk orders will be extremely difficult.

Another place the Cricut Easy Press used to fall short was in the mug department. Since the mug is not on a flat surface, the Easy Press will take time to perform its job. For the mug department, the industrial machine performs better. Or you can use the smallest Cricut Easy Press, but you have to apply it multiple times to make the vinyl stick to the mug. But, for customizing plates, the Easy Press machine is better. 

Please refer to our Frequently Asked Questions if you have any doubts regarding the Cricut Easy Press. If you want to read more blogs like this, please stay connected with us.     

Frequently Asked Questions

What Is The Use Of Cricut Easy Press?

The Cricut Easy Press is specially designed for crafters who are working on heat projects like making T-Shirts. These machines were designed to complete the heating tasks as fast as possible.   

Which Is The Best Cricut Easy Press To Buy in 2022?

We recommend you buy the Cricut Easy Press 2 as this machine comes in three different sizes. You can choose the size from small, medium, and large according to your usage and the materials you want to heat. If you want to heat press adult T-shirts, you should go for the bigger Easy Press machines. 

Is The Cricut Easy Press Worth It To Buy In 2022?

Yes, the Cricut Easy Press is definitely worth the money and is better than the household iron. It is also cheap in price, does all sorts of heat transfer jobs, and offers different settings. For heating.

Some more information: Cricut.com/setup, Cricut.com/setup

Cricut Vinyl Cutter Machines: Which One Should You Choose? || Cricut.com/setup

Cricut Vinyl Cutter machines are very handy and easy to use, whether you are a beginner or a professional. Also, these are essential tools for making any kind of custom art project you want to make using Cricut Heat Press products.

Additionally, these Cricut cutting machines are most suitable for industrial use as they are very fast, reliable, and can cut numerous different materials. You can create your custom-made T-shirt, hats, Mugs, Bags, and many more by printing designs on them. So, to make these things, you have to take the help of a Cricut Vinyl Cutter to cut the material on which you have made the design. 

If you are looking forward to getting any Cricut vinyl cutter, you must know about its features and specification. Thus, in this specific content, you are going to obtain extensive information on some of the Cricut vinyl cutters so you can choose the right one.

What are the best Cricut Vinyl Cutter machines?

Below are some of the best Cricut vinyl cutter machines that offer a perfect service in cutting various materials.

Cricut Explore Air 2

Cricut Explore Air 2 is a midrange material cutter machine that promises to give outstanding performance for your art project. It cuts the material with its strong and swift cutters. It can cut with a capacity of up to 30 centimetres.

Additionally, you get the fast mode option in this machine which can double your work efficiency by cutting the designer faster. Also, apart from the vinyl, you can use this device to cut any material you know. This Cricut Machine is very large in size, having a dimension of 17.8 x 53.8 x 24.2 centimetres. And it comes with built-in storage that makes it very clean and neat.

Furthermore, the Explore Air 2 can be controlled by connecting it to your mobile using Bluetooth connectivity. Plus, the software Cricut is compatible with both Android and iOS. Besides, you can upload numerous fonts and photos to the Explorer Air 2 for free through Bluetooth.

Cricut Explore 3

The dimension and cutting width of the Cricut Explore 3 is 65.5 x 27 x 26.9 cm and 33 cm, respectively. It is the successor of the Cricut Explore Air 2. Plus, this Cricut vinyl cutter is best for cutting smart materials. Additionally, the explore 3 offers a fast speed cutting and also comes at very affordable prices.

Moreover, in this machine, you do not need a mat to cut the paper. As a result, it allows you to cut lengths up to 3.6 metres (or 12 feet) at once. You get various other products such as a power cord, USB cable, start guide, and others. Plus, it also comes with a sample of smart vinyl so you can make a test cut using the machine.

Apart from that, the Explore 3 has already installed a premium quality point blade, an accessory adapter in the machine, and blade housing in the machine. However, this has not very advanced features as the Cricut Makers 3 but is a reliable and compatible machine in this price range.

Cricut Maker

If you are looking for a Cricut machine just to cut vinyl, then the Cricut maker can be a suitable choice for you. The product has solid rotary blades that allow it to cut thicker materials up to 2.4 mm thick. Plus, the cutting width of this Cricut vinyl cutter is 30 cm which is perfect for more significant tasks.

Moreover, it comes with 50 ready-to-go projects straight out of the box. Plus, it is compatible with the Cricut design space, so you can use the projects in the design space. Besides that, the Cricut space design has a free version available, but you can also use the premium version. The premium version helps you to get access to a large number of designs and fonts. Apart from that, you get all these features in this machine at a very convenient cost as it is not so expensive.

Cricut Maker 3

Cricut Maker 3 is the latest iteration of the Cricut Maker. This machine is best for working on large products. Additionally, it is a lot faster than its predecessor Cricut Maker. The Maker 3 has a dimension of 56 x 18 x 15.7 centimetres and a width of 33 cm. Plus, it can cut up to 12 feet of material in one go. As a result, you can easily make real-scale banners and posters.

Cricut Joy

The Cricut joy is portable and is one of the prominent Cricut vinyl cutter machines. Plus, the small size of this machine made it fit in almost any place and is considered best for small projects. The cutting width and dimension of Cricut joy are 21.4 x 13.8 x 10.8 centimetres and 10 cm, respectively.

Additionally, it is very lightweight and can cut up to 20 feet at once. Besides that, there is not any physical machine, so that you can control it entirely by your laptop or phone.

Conclusion

Above, you read the detailed information about the several Cricut Vinyl cutters. Getting a Cricut vinyl cutter can help you get better results in making various print arts. Plus, it can also help your business excel too. So, now you can have any of those machines as per your choice and requirements.

Frequently Asked Questions (FAQs)

What Cricut cutter do I need for vinyl?

There are several Cricut cutter machines you can select to cut the vinyl. However, the latest Cricut products Cricut maker, Cricut Joy, and Cricut Explorer 3 are the best option available at the current time. Additionally, if you use these products, you do not need any mat to cut the vinyl.

Is Cricut a good vinyl cutter?

The Cricut vinyl cutter is one of the most prominent cutting machines on the market. They come in very handy in use and offer a lot of features. As a result, you get a flawless cutting experience no matter which Cricut vinyl cutter you are using. Additionally, with Cricut cutters, you can easily cut many materials.

What’s the difference between a Cricut maker and explore?

Though the basic features of the Cricut maker and the explore are the same, they are different. A wide range of exclusive tools are available for the Maker 3 but not for the Explorer. Hence, these extension tools allow you to cut more than 300 materials using maker 3, while the explore can cut up to only 100 different materials.

Source Url : Cricut Vinyl Cutter Machines: Which One Should You Choose?

How To Make Shirts With Cricut Iron-On Vinyl At Home? || Cricut.com/setup

 One of the most popular and common reasons attracts people to buy the Cricut machine. If you have ever desired to create shirts with Cricut iron-on vinyl, you are in the right place. This blog will teach you how to make shirts with Cricut iron-on vinyl. You can also know the steps to make shirts and what things to avoid and remember.

Generally, users make shirts with the help of the Cricut machine, but they do not properly care about the shirt. In this blog, you will also learn how to fix if iron-on vinyl is not Sticking to the Shirt. This blog also teaches you how to care for your Iron-On shirts in a few simple steps.

Tools & Materials you Need to make Shirts

The Cricut machine is the most valuable tool for cutting and making shirts from iron-on vinyl. You need to know every tool and material before starting the process of how to make shirts with Cricut. Here are the tools and materials you require to make the shirts with Cricut.

Tools:

  • Cricut machine (you can choose anyone from the Cricut Maker 3 or the Cricut Joy to get outstanding results.)
  • Weeding Tools
  • A heat source such as household iron, Cricut EasyPress, or heat press
  • An older StandardGrip or LightGrip Cutting Mat
  • A folded towel or Cricut EasyPress mat gives protection to your work surface.
  • Protective sheets or Teflon sheets, like wax paper, for best output.
  • An operating system, computer, or laptop to make a design for your shirt in Cricut Design Space
  • Scissors

Materials:

  • Cotton shirt or t-shirt, pre-washed without fabric softener
  • Iron-on vinyl

Things to Avoid

In this blog on how to make shirts with Cricut, you can learn about making shirts or t-shirts. After reading this blog, making shirts from Cricut is a very easy and enjoyable task for you. But there are several things that you require to avoid while making shirts with Cricut iron-on vinyl.

Wrong design size

You do not have to make the mistake of design size while doing the project. You can easily visualize the design you make on the shirt while laying out the shirt in Design Space.

Difficult to weed designs

You need to wait until you find some tasks under your belt and also keep away from intricate design at first.

Incorrect temperature

You can’t go wrong if the iron is adjusted to the Linen or Cotton setting or your Cricut Easy Press machine has located the temperature as mentioned in the guide.

Vinyl facing the wrong way

You need to adjust your vinyl in the position where you want to make the design. Always place the career sheet in between the iron and the vinyl. You also keep in mind that you do not directly place the iron on the vinyl because doing this will melt the vinyl and ruin your iron.

Steps to Make Shirts with Cricut Iron-On Vinyl

If you are a beginner and want to know how to make shirts with Cricut iron-on vinyl, go through the given steps below. Here are the steps that you need to follow to do this:

  1. Initially, upload or make the Shirt design

Option 1: Select a pre-design from the Cricut Design Space.

Option 2: Upload an SVG file or an image to Cricut Design Space.

Option 3: Make your own design under Cricut Design Space.

  1. And then, size your design to adjust the shirt.
  1. Now, cut the iron-on vinyl with your Cricut machine.
  1. Next, weed the design.
  1. Prepare for pressing
  1. At last, apply the iron-on vinyl to the shirt.

How to Care for Iron-On Shirts?

Taking care of the shirts you made from the Cricut iron-on vinyl is also important. Many of the makers do not care about the shirts, and lastly, they do not utilize the shirts as it is capable. Here are the steps that you need to follow to utilize the shorts as long as possible.

  1. Firstly, before washing the shirts, you need to wait at least 24 hours after applying the vinyl.
  2. And then, before washing it, you need to turn the shirt inside out. Now, you can carefully wash the shirt and then tumble dry, but also remember to avoid the higher heat settings.
  3. Don’t wash it with bleach.

How to Troubleshoot if the Iron-On Vinyl is not Sticking to the Shirt?

Sometimes the iron-on vinyl is not sticking to the shirts. There are several reasons why the problem occurs. Here are the steps that you have to follow to solve this problem.

  1. First of all, ensure that you’re utilizing the pre-washed shirts for making your design. If you use pre-washing shirts, it does not have oil, dirt, or sizing.
  2. Now, you have to inspect that the temperature is set to the needed point for your material and vinyl. You can also take help from the Cricut Heat guide.
  3. Now, you are required to examine the iron or EasyPress to check that it made full contact with your shirt. If you find any zippers, seams, or folds in the surface, the machine may not make the design. Also, ensure that the utilizing a firm, flat work surface.
  4. Next, you have to apply the heat from both sides of the shirt. You can follow the Cricut Heat Guide for the recommended time.
  5. At last, if all the above steps will not help you in making the shirts, reapply and again follow the steps to do this. And then, with the help of Teflon, you need to line up the design and press the heat machine from the front and also back sides of the shirt.

Cricut Heat Guide: Everything You Need To Know || Cricut.com/setup

 Since the year 2017, when Cricut launched its first heat press in the market, there has been no looking back from its side. We can find quite a big product range of heat presses in its Cricut Heat Press/ Easy Press product line-up. From the first Cricut Easy Press, which was a much rather basic product, to Cricut Easy Press 2 with three different sizes available, to the Cricut Mini Press, Cricut Mug Press, Cricut Easy Press 3, Cricut Hat Press, and Cricut Auto Press.

Cricut has launched so many products in its Cricut Heat product range. This blog is written keeping in mind all the necessary details one needs to get started with Cricut Heat Press. So, keep reading further to learn everything about Cricut Heat Guide, and I assure you by the end of the article, you will become a pro at using Cricut Heat presses.

Cricut.com/Setup

How Many Cricut Heat Press Are There?

Every Cricut Heat press has different temperature and time settings depending on the fabric you are using it on. The temperature and time settings for Cricut Easy Press for cotton fabric will be different compared to that of the vinyl material. Similarly, the temperature and time setting for Cricut Easy Press and Cricut Easy Press 2 will be different. The reason is simple every model has a different set of features and is made for varying purposes. The various range of products in the Cricut Heat Press products line up are as follows:

Cricut Easy Press

Cricut Easy Press was launched in the market in August 2017 with a heat plate of 9 inches X 9 inches dimensions. It is a combination of an iron that we use in our homes and fool-proof convenient heat-transfer technology. This machine was designed by Cricut specifically for transferring iron-on materials to creative projects like t-shirts, cotton fabrics, heat transfer vinyl, etc.

Cricut.com/Setup

Cricut Easy Press 2

Cricut Easy Press 2 was launched in the market just a year later, and it is an advanced model if you compare it with the previous one. The Easy Press 2 gets hotter and heats up much faster compared to the original model. This tool is designed specifically for adding iron-on materials to all your creative projects. It is made with the finest materials and technologies that give you a professional iron-on finish in less than 60 seconds.

Cricut.com/Setup

Cricut Easy Press Mini

As the name of the product suggests, this is a smaller version of Cricut heat presses that were previously available in the market. The Cricut Easy Press mini is used for pressing heat on smaller objects like stuffed animals, hats, shoes, etc.

Cricut.com/Setup

Cricut Mug Press

The Cricut Mug Press is modeled in a mug shape, so it perfectly wraps around the outside area of the coffee mugs. It heats up both the infusible ink sheets and the designs that are drawn with infusible ink markers. Use it with the Cricut Heat Guide for perfect results.

Cricut Easy Press 3

The Cricut Easy Press 3 is a more refined version of the other two Easy Presses bringing new meaning to “easy.” This latest addition gives a new level of ease to your heat transfer projects. The best part about this easy press 3 is that you can pair it with the new Cricut Heat application that is meant to guide you through any heat transfer project you take on. This app is filled with all the necessary information about every heat press project possible. It guides you through a list of supplies that you need for your project and shows you how you can stack the materials for proper pressing.

Cricut Hat Press

The Cricut Hat press is a one-of-a-kind handheld hat press that will make you a pro at creating beautiful hats at home. It works on materials with varying surfaces and curves. It works on materials with varying surfaces and curves. You can work with your Cricut hat press on almost of types of hats, be it bucket hats to trucker hats. Just the way other heat press products are designed with a ceramic-coated plate at their base, in the same way, the hat press has the same heat plate for even distribution of heat on the materials you are working on.

Cricut Auto Press

This is the most advanced heat press ever made, which is a merger between commercial power and a home-friendly sleek body. It is built with high-quality components and sturdy steel construction to deliver professional-level production.

Cricut.com/Setup

Cricut Heat Guide

I went to the official website of Cricut and searched for the Cricut Heat guide. I was really happy with what came on my screen. So basically, the first screen of the Heat Guide has an image of all the products they have launched in the Cricut Heat family. In case you are not aware of which heat press you have; you can find that out just by clicking on “Which Cricut EasyPress do I have? Find out Here.”

Just below that option on the first page of the Cricut Heat guide, you get two small drop-down options. The first one is Heat-Transfer material, where you can select the HTV material that you are using by clicking on the small downward-facing arrow. The second option that you have is to choose which base material you are using. After selecting both the options, select that you are using the Cricut Pressing mat. And then, all you need to do is click on the green “APPLY.”

Once I chose the heat transfer and the base material, I got the answer of what temperature I should select on my heat press machine. And I also got other important information like how much time I should apply it, how long I need to pre-heat the Cricut Easy press, how much pressure I must apply, how long I need to flip and press, and lastly, when to remove the heat press from my materials.

If you want, you can also check the temperature in Celsius by selecting “c.” What I really liked about using the Cricut Heat Guide on the website of Cricut was that just below all the important information, the website guided me further on what supplies I will need for the project. When you swipe down your screen a little bit further, you will find the information broken into four sub-headings numbered from one to four. The first one is mentioned earlier in the list of supplies, and the second one is Prep, which means you must prepare beforehand.

The third one informs you of the application procedure, and lastly, you get information on the care you need to do of your material once you have completed the project. After all the information, if you need any extra help, you have the option. By clicking on the green “Learn More,” you can read Cricut’s step-by-step tutorials.

How To Read The Cricut Heat Guide?

Every template that you get to read the temperature, pressure, and time required for the particular Cricut Heat press machine will vary according to the Heat Press machine that you are using. Here is a memo Cricut heat guide of Easy Press 2 that will help you to understand how to read every other heat press guide:

From the top of the page

The top of the Cricut Heat Guide template can tell the user the materials that are covered along with the temperature and time chart at a glance. This information is very important as the values of time and temperature may significantly vary depending on whether the user is using the Easy Press mat or a towel.

Read the Menu Bar

The menu bar is the small section present just below the top heading area of the Cricut Heat Guide template. This bar shows the specific Iron-on variety mentioned in the left-hand column, followed by the pressure that is required by the material. The pressure values are usually either “firm” or “light” and are the same across all the base materials. The final section in the Menu Bar is the names of the base materials.

Follow the Chart Body

The chart body of the Cricut Heat Guide template has the temperatures mentioned in it because it is the most crucial part of using any Heat Press. The temperature of each base material and different Iron-On Heat Transfer materials are given in degrees Fahrenheit. The press time is indicated in seconds; next to the time mentioned, you might find a value written in brackets. This bracket includes the value if there is an exception to the noted pressure for the given iron-on materials.

Don’t Forget About The Notes Section

We often neglect the small notes portion given at the bottom of the Cricut Heat Guide, but it sure carries the important piece of information we must read. At the bottom, the notes have press instructions, special application instructions, and carrier sheet peeling instructions.

For more Information: https://ny-cricut.com/cricut-heat-guide/

How To Clean A Cricut Mat At Home? [3 Best Methods] || Cricut.com/setup

When your Cricut mat gets dirty and loses its stickiness, you may wonder: how to clean a Cricut mat? Or just throw it in the trash and buy a new Cricut mat? A sticky Cricut mat is a key to success in doing the best craft projects with a Cricut machine. The best way to keep Cricut mats sticky is to keep them clean. But, as we use mats and cut more and more things, the mat wears out and becomes dirty, causing them to lose their stick. This causes the material to slide around while cutting, resulting in a bad cut. So, we will guide you on how to clean a Cricut mat at home with some tips and tricks.

The life of Cricut mats will vary depending on the material used or cut and how often the Cricut mats are cleaned. But with regular attention, you can keep Cricut mats in tip-top condition for a long time and save your time and money by stopping another trip to the store.

cricut.com/setup

How Often Should You Clean Cricut Mats?

First, let’s talk about taking care of Cricut mats before “fixing” them. If you craft daily with your Cricut mats, you need to clean your Cricut mats more often if you craft once a week. The better you take care of Cricut mats during your daily craft projects, the longer they will last for you to use.

Depending on your material, most Cricut mats require cleaning after 2-4 cuts. We suggest cleaning Your Cricut mat whenever you see that the material doesn’t stick as well as before.

You may need to clean your Cricut mat more often if you use a material that leaves a lot of debris, such as felt, glitter vinyl, denim, or leather. You must clean your Cricut mats after cutting wooden material with a knife blade. But, if you stick to smooth materials like paper, vinyl, and cardstock, you can probably get away with less cleanup.

Every Cricut mat includes a clear protective sheet from StandardGrip and LightGrip to FabricGripStrongGrip, and even Card Mats. These sheets aren’t for shipping or retail packaging; they are intended to be kept and used throughout the lifecycle of the Cricut mat.

These sheets serve two main purposes:

  • It covers and protects the adhesive surface of the Cricut mat, so it does not stick to other items when the Cricut mat is not in use. These sheets eventually let you stack Cricut mats on top of each other, put them in baskets, on shelves, etc.
  • Also, it keeps environmental dust from sticking to the Cricut mat. Leaving mats uncovered allows dust to collect on them, which reduces their stickiness more quickly.

Method 1: How To Clean a Cricut Mat with Baby Wipes

Do you know that you can give a new life to your Cricut mat to make it sticky again? To clean a Cricut mat, simply use alcohol-free baby wipes or wet wipes handy to wipe down your Cricut mat.

If it’s dirty with fibers or whatnot (other particles), wipe in small circles around your entire Cricut mat until it’s clean, then let it dry, which takes about 10 minutes or more. You can lay them flat while they dry or hang them on a drying rack; make sure to take them down when they dry so they don’t deteriorate over time. Baby wipes not only clean your Cricut mat but also help it retain some of its stickiness. So wiped it off the old one with wet wipes, and it became sticky and usable again.

Method 2: How To Clean a Cricut Mat with Dish Detergent

You can also use a gentle dish detergent to clean a Cricut mat if you don’t have baby wipes or wet wipes. To do this, run a small amount of dish detergent, such as Dawn dish soap, with warm water (not hot water) on your Cricut mat.

Cricut says that you can use a plastic, stiff-bristled brush to gently scrub with warm soapy water until the entire surface of your Cricut mat is clean. But, make sure you scrub gently, as it’s possible to scrub off the adhesive, so you must use a brush, not a scrubbing sponge. When done, let it dry with a paper towel, and then allow your Cricut mat to air dry thoroughly, and it should be sticky once again.

Method 3: How To Clean a Cricut Mat with a Stick Lint Roller

Always be gentle with your Cricut mats; they can also last you through many rounds.

To clean a Cricut mat, run a sticky lint roller (or a loop of masking tape) over your Cricut mat to remove dust, fibers, bits of paper, and hair. This can be done daily, between projects, when you forget to cover your Cricut mat overnight, or when you see bits and fibers on your Cricut mat. This is the best method to remove any leftover bits or pieces of paper. When the lint roller is stickier than your Cricut mat, it pulls all the offending hairs and pieces of paper right off your Cricut mat. It works quite well on less sticky Cricut mats.

Source URL : https://ny-cricut.com/how-to-clean-a-cricut-mat-at-home/

How To Cut Vinyl With Cricut? [ A Comprehensive Guide] || Cricut.com/setup

Want to learn how to cut vinyl with Cricut but don't know how to get started? The good news is that it's easy to work with vinyl. This post will teach you how to do it and get beautiful results. Vinyl is the material you can cut and apply to create your craft projects, including tumblers, decorated mugs, stickers, and decals.

Vinyl has two parts. The upper layer is genuine vinyl and has a sticky on the backside. The back layer is a paper liner. You can think of craft vinyl as a sticker. Cutting vinyl with a Cricut machine allows you to create precise cuts and complex designs.

Cricut machines are great for creating all kinds of craft projects, from home decor to customized gifts and many more. Below we will guide you on how to cut vinyl with Cricut through the step-by-step instructions.

Cricut Guide: How To Cut Vinyl With Cricut

Follow the basic steps to cut vinyl with Cricut; let's look at each part of the procedure in more detail.


1.  Design Your Project at Cricut Design Space

To learn how to cut Vinyl with Cricut, first, open the Cricut Design Space and create a new project. Add an image to the Canvas. Select one of the pre-create Cricut projects, add an image from the Cricut Access library, or upload your SVG file.

When your design is prepared, tap the green Make It button.

On your next Prepare screen, you'll notice that the pieces in your project have been separated into mats by color. Properly check that everything looks as it should.

If your design pieces are not where you want them, you can go back to your canvas screen and "Attach" them. Once everything looks as it should tap the green Continue button.


2.  Put the Vinyl On Your Cricut Mat

Lay a blue or green cutting mat on your flat project surface, and remove the transparent plastic protective sheet. Lay the vinyl on your mat, paper liner side down. Try to align the edges of the vinyl with the grid on your mat.


Smooth your vinyl with a scraper tool or brayer. Try to eliminate any air bubbles that may interfere with your cut.

Put the mat in your Cricut machine. Align the edges of your mat with the guide. Then tap the Load button to load the mat into your Cricut machine.

3.  Select Your Material Settings

Back to Design Space. You will be viewing the Make screen, where you choose the right cut setting for your vinyl.


Follow your on-screen steps to Set Base Material. Select a vinyl setting from the list of options. If you don't see Vinyl in the Favorites list, select Browse All materials to access the full list of material settings.

Note: If you're using the Cricut Explore Air 2, you can choose a material set by turning on the Smart Set dial on your machine.

Next, ensure you've loaded the right cutting blade into your Cricut machine (vinyl, use a fine-point blade.)


When you're prepared, tap the Go button to start cutting.

4.  Weed Your Design

When your cut is finished, tap the Load button again to take off your mat. Now, you will remove the extra vinyl from the design with a weeding tool.


What is weeding? Weeding means removing extra vinyl from spaces around your design that you don't want to transfer to your final product.


Next, turn your mat upside down on a clean project surface, and peel your mat away from the vinyl. Peeling your mat off the vinyl, rather than the other way around, helps keep the vinyl from curling or cracking.

5.  Prepare Your Project Surface

Ensure the project surface of your base material is dry and clean before applying vinyl. You want to remove any dust, lint, or oil that may be preventing the vinyl from sticking to your project surface. It’ll help you easily cut vinyl with Cricut.


6.  Apply Transfer Tape To Your Vinyl Design

Cut transfer tape that is slightly larger than your vinyl design. Peel the backing paper off your transfer tape. Lay the transfer tape over your vinyl design, using the grid lines to keep everything straight and lined up.


Use the scraper tool to smooth out your transfer tape into your vinyl. This helps the transfer tape stay on your vinyl design.

7.  Peel Your Transfer Tape and Vinyl Design Away From the Paper Liner

Slowly and carefully peel off your transfer tape at a 45-degree angle from your vinyl paper backing. The transfer tape should remove the vinyl design away from its paper backing. If the vinyl doesn't stick to your transfer tape, put your tape back down and burn it again.


8.  Apply Vinyl To the Project

Use transfer tape to apply the vinyl design to your project. You can use the grid lines on your transfer tape to ensure your design is completely aligned. Apply pressure to your vinyl to adhere it to the project. Use a scraper tool to burn your design onto the project. Start in the center of your design and work towards your edges, which can become air bubbles.


9.  Remove Transfer Tape

Slowly peel your transfer tape off the project surface. Try removing at 45 degrees angle. The transfer tape should be removed, leaving behind the vinyl design.


If your vinyl design does not remove from your transfer tape, put your transfer tape back down, and burn again. Then, try again.


Now you've completely removed your transfer tape; you can see your completed design. Allow your vinyl to fix for 24 hours before washing or dampening it. Letting your vinyl will give it time to form a stronger bond, and you'll get the best long-term results.

Source URL:- https://ny-cricut.com/

All You Need to Know About Cricut Explore Air 2

In this short review, we have covered everything a user should know about Cricut Explore Air 2. This series by Cricut helps you make the cra...